Levitation Photography
Levitational photography comes across straight away to be quite interesting. When I had first come across this style of photography I questioned my self about how this style of photography is created. After some research I have learnt the process of creating these styles. At first it did come across as quite odd, this was because it is a very surreal type of photography. Moreover, being able to achieve a realistic look is what makes levitation photography what is it, because without being able to achieve a realistic look it does not really as appealing as it should be. Moreover, depending on the levitation in the photograph it can sometimes be quite humorous, which is something great to achieve from a single photograph, therefore I do admire this style of photography.

Achieving Levitation
Below are three methods I had learnt in order to create LEVITATION photography.
The Jump Method -
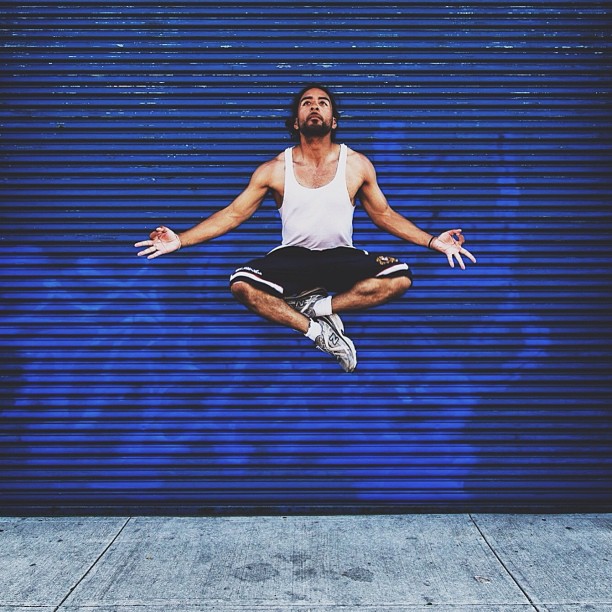
There are also other methods which can also assist in creating the levitation effect. The 'Jump Method', the way this is done is by having the model to pretty much jump and taking the shot whilst the model is in mid-air. This method can help to achieve a more natural look as not much editing will be needed, as the levitation is created whilst the model is in mid-air and the shot is taken. Although this method is a lot more easier and saves much hassle, it is also quite dangerous as the model will have to jump is different ways hoping they do not end up with an injury.
Support Method -
This method is a lot easier and preferred by myself, it is similar to the two photos method, however not exactly. In the example below; I had firstly taken a photo of the background. Leaving my my camera exactly where it is, I had placed a stool (which is the 'support' part of the method) under my model and had got my model to lay on the stool and position in a way were it looks as if he is floating. I had then taken the second photograph and put both photographs (the background shot and shot of model) together in photoshop, and carefully using the eraser had erased the stool away.
http://petapixel.com/2015/02/10/levitation-photography-tutorial/
Jump Method |
Support Method |
Maria Netsounski_


Maria Netsounski a portrait, landscape and city photographer with an eye for the beauty of the world. She was born and brought up in Moscow, Russia. By the age of 24 she had moved to the Netherlands. Over the last 10 years photography has become her passion. She pursued her passion for photography, going on to study in 2008 at Fotovakschool in Amsterdam. Since graduating, she has become a professional photographer producing creative portraits of different people. Using the most advanced photographic techniques, she can turn a familiar town or landscape into a fairy-tale land.

|

|
|
This is one of the levitation pieces i really do admire by Maria. When I had saw this photograph for the first time it had given off a pretty bizarre atmosphere. However, when I had observed this photo I had began to find it humorous as it was very odd and unusual to see, as you don't see things floating everyday. This photograph is taken in a living room and it looks almost as if there is no gravity, this is the effect I want to achieve when attempting to recreate Maria's work. She has used the objects in the living room to levitate along with her model making it look like the model has powers.
|
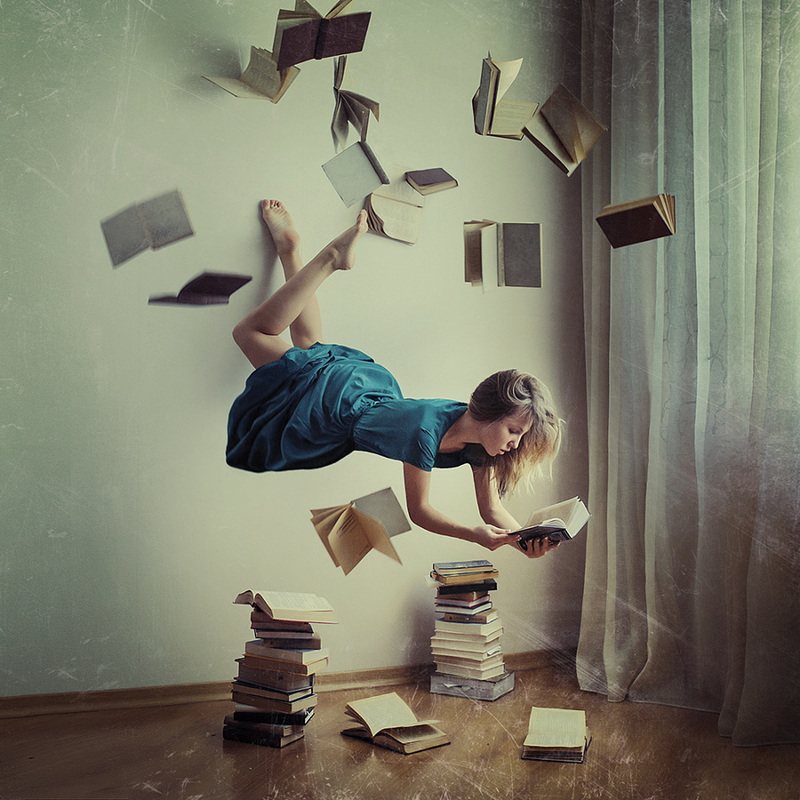
Another piece by Maria which is really inspiring. After observing a lot of Maria's work I have noticed her profession in the editing. Her work looks as if it is real and she had just pressed shoot on her camera. I am inspired by this, I will try to achieve her style of photography. This photograph has a few similarities as the other photograph, for example the use of the no gravity effect. The photograph shows gym balls floating in the air, along with a model. I had noticed Maria will do the levitation effect in doors mostly rather than outdoors, i quite like this as you can make a lot of things levitate indoors, for example in a kitchen you could levitate the utensils.
|
Recreation
Below are two pieces which I have tried to recreate in the style of Maria Netsounski. Using Photoshop I edited thee photographs to achieve a realistic no gravity look. I had managed to create the levitation simply by taking photograph of just the background and then taking the photo again in the same position with my model. Using photoshop I had put both photographs together; the background and the levitation and then using the eraser tool to rub out the parts of the photograph that I do not want which will then bring out the background from behind making the model look like they are levitating.
Ian Norman

|

|
|
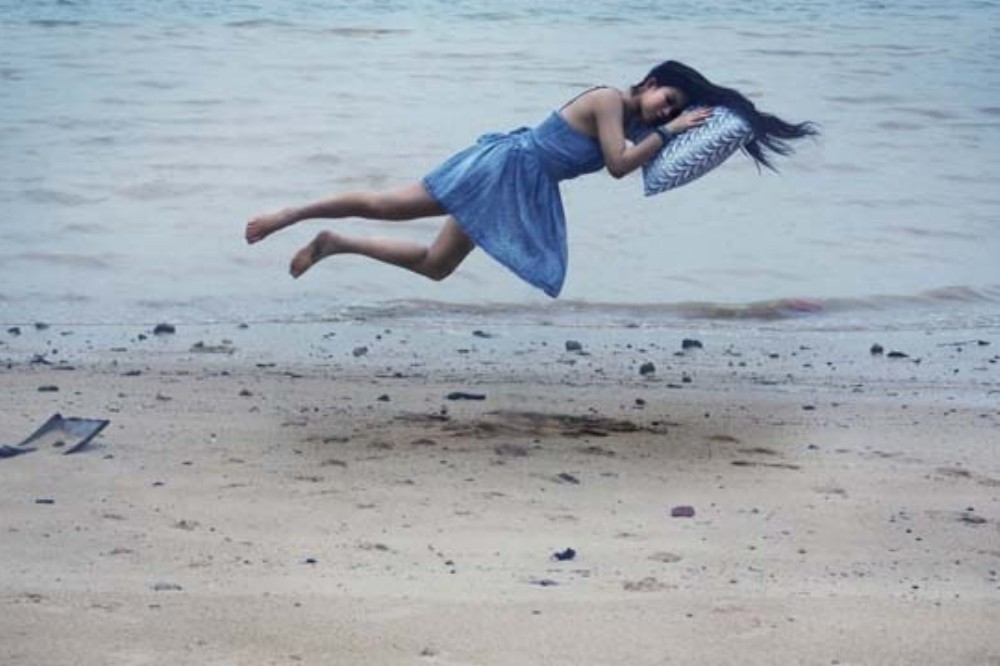
This photograph taken by Ian Norman is a very interesting piece. He had used the support method in order to create the effect. The mood of the photograph is very calming and sofas the location seems quite peaceful. We can clearly see the beach of sea and sand which contributes to the atmosphere of the photograph overall. After analysing the photograph I did question why the model is in an awkward pose, however after researching I had found that Ian Norman prefers to make the model pose in a way where their legs are above their head, he believes this really executes the levitation effect.
|
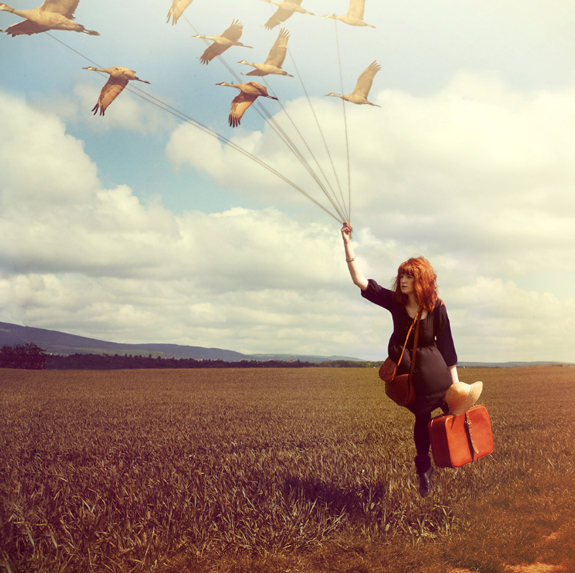
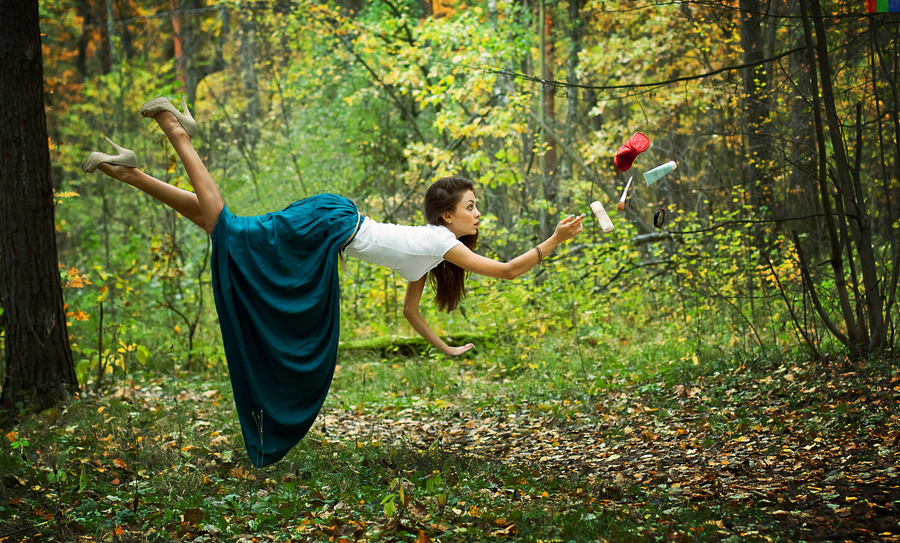
The photograph is set in a forest like area, we can see in the image that the model is pretty much floating above the ground. From my research I can tell this is done through the 'support method', this is because Norman prefers to use this method as it as much easier than other methods, also safer. The model in the photograph looks as if she if she is being abducted as we can see from the expression on her face. The location seems quite isolated and closed off, which may be why the model is presented as being abducted.
|
Recreation
take shoot of floating feet above head in a forest or park.
I had used the 'support' method in order to create this recreation, I had used this method as it is a lot more easier and effective than other methods. As you can see in the raw image I had ordered my model to pose in way where he is almost be abducted. In order to achieve the same look as Ian I had told my model to keep his feet above his head, as Ian thought this was more effective way to make it look as if the person is levitating. I had also kept my camera placed in the same place from when I had taken the 'background' shot to when I had taken the 'action' shot, this has enabled me to erase out the supporting object underneath the model and achieve that levitation look.
I had used the 'support' method in order to create this recreation, I had used this method as it is a lot more easier and effective than other methods. As you can see in the raw image I had ordered my model to pose in way where he is almost be abducted. In order to achieve the same look as Ian I had told my model to keep his feet above his head, as Ian thought this was more effective way to make it look as if the person is levitating. I had also kept my camera placed in the same place from when I had taken the 'background' shot to when I had taken the 'action' shot, this has enabled me to erase out the supporting object underneath the model and achieve that levitation look.
PHotoshoots
PHOTOSHOOT #1
Experiment with levitation by using different methods; Jump Method/Support Method.
Outdoors
Experiment with levitation by using different methods; Jump Method/Support Method.
Outdoors
PHOTOSHOOT #2
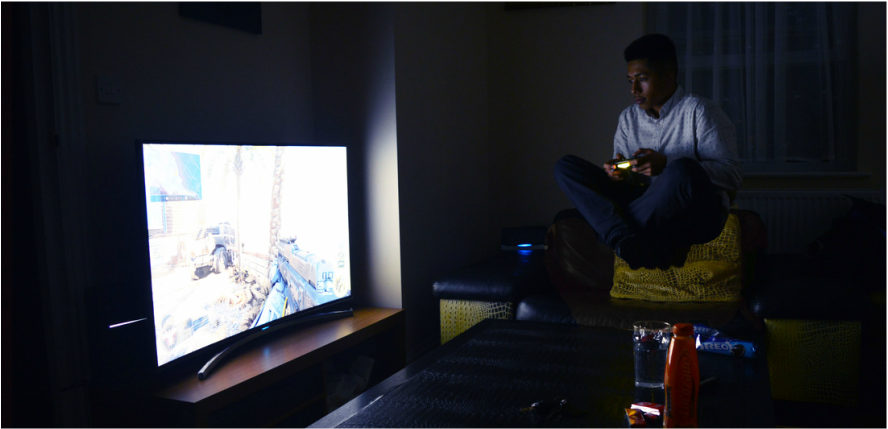
I had taken this photoshoot in the living room of a household. Firstly I had taken a shot of the setting, then leaving the camera in the same place taking another shot of my model positioned on a box; which is the source of support which I will then erase in Photoshop. This shoot features a person playing a video game who is levitating at the same time. I positioned my models in different ways, e.g. positioned the model to look as if he is literally being drawn into the screen. This shoot had some tricky sides to it as when I take the background image, I had to make sure I do move anything within the frame as when it comes to the editing stage it can cause problem.
I had taken this photoshoot in the living room of a household. Firstly I had taken a shot of the setting, then leaving the camera in the same place taking another shot of my model positioned on a box; which is the source of support which I will then erase in Photoshop. This shoot features a person playing a video game who is levitating at the same time. I positioned my models in different ways, e.g. positioned the model to look as if he is literally being drawn into the screen. This shoot had some tricky sides to it as when I take the background image, I had to make sure I do move anything within the frame as when it comes to the editing stage it can cause problem.
PHOTOSHOOT #3
This is one of the experimentation that I had done using the photo from my second photo-shoot. Using Photoshop I had removed the 'supporting' object from under my model using the 'eraser' tool. This had then brought the background out out from behind my model, creating a levitating effect. I had chosen to take this shoot in a living room whilst my model is casually playing play-station, this is because I thought it would be unusual to see someone randomly floating whilst playing play-station. I thought this was effective because it almost looks as if the model is so engaged with the game he has begun to float, and that is something you would find in a video game itself.
Experimentations